

Who am I?

- ~Iffy~ @ StayAtHomeNation
- Hi, I'm Cameron (aka Iffy), a stay at home mother to 4 beautiful children. My family is my life! I am not crafty by nature....but I am learning =D I will share my experiences with you(good & bad) with crafts, DIY, cooking, and life. I say what's on my mind, and remain honest, it's just who I am. Love it or leave it =D So follow me and see my progress as I document my journey, and If All Else Fails....at least you have gained a friend and gotten some great tips or maybe learned something new along the way!
Tuesday, May 17, 2011
Slow Cooker Dinner #1 ~ Iffy's Edited Thunderbird Stew
Since there was a chill in the air I decided to make a pot of my Slow Cooker Stew.
 This is perfect for a chilly evening(I know it's May....& yes it dropped off enough to make a batch) :)
I got the base recipe from allrecipes, but as always I tweak it to my liking)
Here's what I used but it's very easy to customize to your preference:
Meat(I used almost 3lbs Chuck Roast)
Red Potatoes(I used 8, but you can use as many or as few as you want)
Baby Carrots(I used 2-3 handfuls but again edit to your liking)
1 large sweet onion
2 packets of brown gravy mix(I used French's)
3 cups Apple Juice
1 cup Water
Packet of vegetable dip mix(I added it after I took the picture)
 I forgot the meat in the picture too, so here's what I used
 Then I washed and chopped the potatoes to sizes I like
 To the empty crock pot(or slow cooker) I poured 3 cups of apple juice & 1 cup of water,
then with a whisk stirred in the brown gravy packets
 Then the vegetable dip packet
 then stirred again
 Lay the meat into the gravy mix carefully so it doesn't splash
 and push down slightly to cover the meat.
Then drop in your potato chunks
 and onion
 and then your carrots
 I added another handful after this picture.
Then cook on low for 6-8 hours depending on how much meat you're cooking and such.
Sometimes I will crank it up to high for a few hours then low the rest of the time to cut down on the cooking time.
You could cook it all on high and cut the time in half if you wanted
but cooking it slow results in a much more tender meat.
This is such a quick, tasty dish that is filling and has plenty of veggies.
I like to serve a bowl of this with some croissants
& a salad.
Yum!
~Iffy~

I got the base recipe from allrecipes, but as always I tweak it to my liking)
Here's what I used but it's very easy to customize to your preference:
Meat(I used almost 3lbs Chuck Roast)
Red Potatoes(I used 8, but you can use as many or as few as you want)
Baby Carrots(I used 2-3 handfuls but again edit to your liking)
1 large sweet onion
2 packets of brown gravy mix(I used French's)
3 cups Apple Juice
1 cup Water
Packet of vegetable dip mix(I added it after I took the picture)


then with a whisk stirred in the brown gravy packets


Then drop in your potato chunks


Then cook on low for 6-8 hours depending on how much meat you're cooking and such.
Sometimes I will crank it up to high for a few hours then low the rest of the time to cut down on the cooking time.
You could cook it all on high and cut the time in half if you wanted
but cooking it slow results in a much more tender meat.
I like to serve a bowl of this with some croissants
& a salad.
Yum!
~Iffy~

Tuesday, May 10, 2011
Sweet Tooth Satisfaction # 1 ~ Homemade Icing
It's been so busy here lately & I haven't had much free time.
However, you can count on a post from me at least once a week, more if I have the time.
 Today I am going to share with you my homemade icing recipe. Don't they look yummy?
However, you can count on a post from me at least once a week, more if I have the time.

I made these little cupcakes for Sydney & her class today to celebrate her 7th birthday.
Yay Happy Birthday!
For the Icing you will need:
1/2 cup(1 stick) butter, softened
1/2 cup solid vegetable shortening
1 teaspoon vanilla extract
4 cups sifted powdered sugar
2 Tablespoons milk or water
For the Icing you will need:
1/2 cup(1 stick) butter, softened
1/2 cup solid vegetable shortening
1 teaspoon vanilla extract
4 cups sifted powdered sugar
2 Tablespoons milk or water

and set aside.


If you don't have a sifter(or like me and hate using it)
then put the powdered sugar in a wire strainer & with a wire whisk just stir it around until it's all sifted through.
Or you can even skip the strainer & just stir it with the whisk but for something like this I like it to go through the strainer.

add your 1 tsp vanilla and mix.

Then gradually add the powdered sugar to the creamed mixture.
(I use 3 spatulas worth at a time or you can add 1 cup at a time)
 Beat well on medium speed, and be sure to scrape the sides & bottom often.
Once all the powdered sugar is added it will look pretty dry
 add 2 Tbs water or milk(I use water so I don't have to refrigerate it).
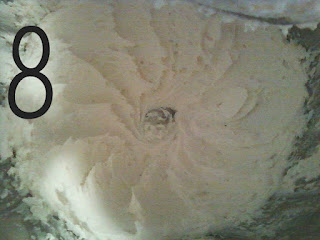 Beat on medium-high speed until light & fluffy(this does not take long at all).
 Then you can either keep it white or add food coloring
(I used 6-7 drops of red to make this light pink as requested from the birthday girl).
You can even split it up and make several colors, because this makes quite a bit.
 Then I put it into my nifty little piping bag with a 3 star tip(not sure the correct term).
I got the whole kit with assorted tips from Ikea for pretty cheap, just to see if I liked it, which I do.
Although I would like to upgrade since I seem to be using it more often & need one that will last longer.
 Here is the end result.
Cute & yummy =D
And it freezes well too!
Hope this satisfies your sweet tooth for now....
until next time,
~Iffy~
Oh and a BIG thanks to all of you who linked up to my very first party! I will be hosting a link party or two & a giveaway once a month. So check in often & follow my blog to stay posted because I have some really great giveaways coming up-stay tuned.
I'm partying with
(I use 3 spatulas worth at a time or you can add 1 cup at a time)

Once all the powdered sugar is added it will look pretty dry


(I used 6-7 drops of red to make this light pink as requested from the birthday girl).
You can even split it up and make several colors, because this makes quite a bit.

I got the whole kit with assorted tips from Ikea for pretty cheap, just to see if I liked it, which I do.
Although I would like to upgrade since I seem to be using it more often & need one that will last longer.

Cute & yummy =D
And it freezes well too!
Hope this satisfies your sweet tooth for now....
until next time,
~Iffy~
Oh and a BIG thanks to all of you who linked up to my very first party! I will be hosting a link party or two & a giveaway once a month. So check in often & follow my blog to stay posted because I have some really great giveaways coming up-stay tuned.
I'm partying with


Thursday, May 5, 2011
Come Join My Mother's Day Party!! ~#1
Since Mother's Day is Sunday I thought it would be nice to celebrate early.

This is me & my family. I am so fortunate to have such an amazing husband, and 4 wonderful children!
I absolutely LOVE to get handmade gifts from them.
It's a million times better than anything you could buy in a store.
So for my very first linky party you can post ANYTHING Mother's Day related!
It can be a craft or something your kiddies have made at school or home for you, a recipe for a Mother's Day treat, ideas, or just a post/comment of something beautiful.
Laurie over at Tip Junkie has a collection of crafts kids can make
 Like this beautiful Stepping Stone from Midwest Moms


or these flowers from shannon makes stuff

and how about a cute AND free handprint poem
or
and these can be enjoyed year round
and these can be enjoyed year round

Tiny Polaroid Magnets from Ambrosia girl
Just to name a few. How stinkin cute right?
So now I'm ready to see yours.
This is pretty much a test run for some great up coming giveaways I will be hosting.
So I would love it if you help me spread the word by linking to my post on your blog & while you are at it come join my party!
(I will be attempting to make a button, but in the meantime you can just link to my post)
If you would like to join my first party ever,
1-If you're not following me already, please do so(I'd love for you to know when my awesome giveaways are being held)
2- Leave me a comment, not required but it'd be nice to say hi
3- Please link to your actual post, not your homepage(you can link 2 or 3 of your favs)
4- Be nice and visit/comment on another entry or two
5 -That's it, be nice and enjoy your weekend!
And to all you moms out there
Happy Mother's Day!!!!!!

Here are some flowers for you....(Phlox) man I love this stuff!
~Iffy~
Wednesday, May 4, 2011
RSV & my little man
I have not posted in a week due to lack of time & energy.
We don't get sick often, but when we get sick......go all out.
So last week 4 out of 6 of us were sick......no fun at all.

This is Landon, he tested positive for RSV last week,
so we've been doing breathing treatments 3 times a day since then.
It's fairly common but typically in the winter months, they say. It can be hard on infants and feel like a really bad cold in older kids & adults.
Apparently when Sydney came down with strep, she had RSV too,
which she then passed to Michaela,
and then I thought I was coming down with strep too,
so the 3 of us were on antibiotics.
After 4 days, I wasn't feeling any relief, but the girls were fever free & on the mend.
Then Landon started with a stuffy, stuffy nose which progressed overnight
into a chesty cough.
The next evening he had a rattle in his chest & was wheezing.
I of course didn't get much sleep that night as my husband was at work & I was worried about my baby.
The next morning we took him to the Dr.
Since they said it's highly unlikely for a child under 3 to have strep
(even though my 19 month old tested positive for strep just days prior),
they swabbed his itty bitty nose.
(even though my 19 month old tested positive for strep just days prior),
they swabbed his itty bitty nose.
He tested positive for RSV.
It's a virus so it has to run its course, but his was more advanced than normal.
The treatments are helping him out so much though!

It makes him yawn quite a bit

And sometimes he tries to swat it away or pull the string

All in all he is in good spirits & does really good with the treatments.
When the nurse was showing me how to use the nebulizer, she couldn't
believe with 4 kids I had never had to use one.
Call me lucky (or a germ-a-phobe)
but my kiddies have stayed pretty healthy throughout their lives.
Knock on wood =D
~Iffy~
Sunday, April 24, 2011
Easter/Spring Wreath-redo
Happy Easter guys!!

I've had 2 children down with strep this week.....no fun at all, because it's both my girls.

I've had 2 children down with strep this week.....no fun at all, because it's both my girls.
Sydney got it Tuesday & missed 3 days of school & took Michaela to the Dr yesterday and yep now she has it too. I'm crossing my fingers that Jackson & Landon don't get it.
So Easter will be celebrated with Amoxil-poor guys.
Here is my latest crafty decor piece-finished before the sickness crept in the house
I wanted to quickly post my Easter/Spring Wreath before Easter is gone.
I saw a wreath I fell in love with over at the adventures of nick and jessica but there was no tutorial to go along with it so here is what I did:
I saw a wreath I fell in love with over at the adventures of nick and jessica but there was no tutorial to go along with it so here is what I did:
First I started with a winter wreath from Target I've had for 3-4 years and
I wanted to update it for the Spring.

an old wreath
plastic eggs
latex paint
foam brushes
paper plate
small paint brush
raffia
First I removed the berries & frosted sticks that were glued into the wreath.


Then I took 3 oops paint samples(.50 each woohoo!) that I had purchased from Home Depot.
There was brown, blueish gray, & a cream color paint.


Then I repeated that process again, touching up any spots that had dried to the plate & peeled away.
At this point I thought all of the paint would end up peeling off and revealing the colored, plastic eggs beneath.
I decided to keep going and just see how things turned out. I suppose if I had more colors of spray paint on hand I would've tried that as it would have eliminated the peeling of the latex paint.
Then I was ready for my accents,

all I did was dip the narrow, wood end of my thin paint brush into an opposite color and either put dots or

just swept back & forth over the egg, depending on the look I wanted.

I left a few solid, & some I even went back and put some more paint of the 3rd color in the same manner.

I really love how these were looking!


Once I achieved the look I imagined with the raffia, it was time to add some eggs!

I carefully opened the eggs and placed a piece of raffia at the hinge and snapped it back tightly.


I thought the opening of the wreath was a bit too open & bare, so I added a cluster of eggs.

I did this by attaching 1 egg to the raffia, as described above,
making sure it was in the center of the piece of raffia.

I took the extra length of the raffia (after I tied each egg to the wreath)
and weaved that through the wreath as well.
Finally I took a bunch of raffia and just tied a bow at the bottom of the wreath

and
TaDa....

I was going to add some purple silk flowers but didn't have any on hand, then thought a purple bow but since I have not learned how to make a bow from ribbon yet
I opted for the raffia.
Very earthy and a completely different look from what I started with.
Before:


Do you like it?
~Iffy~
Partying with


Subscribe to:
Posts (Atom)
Popular Posts


